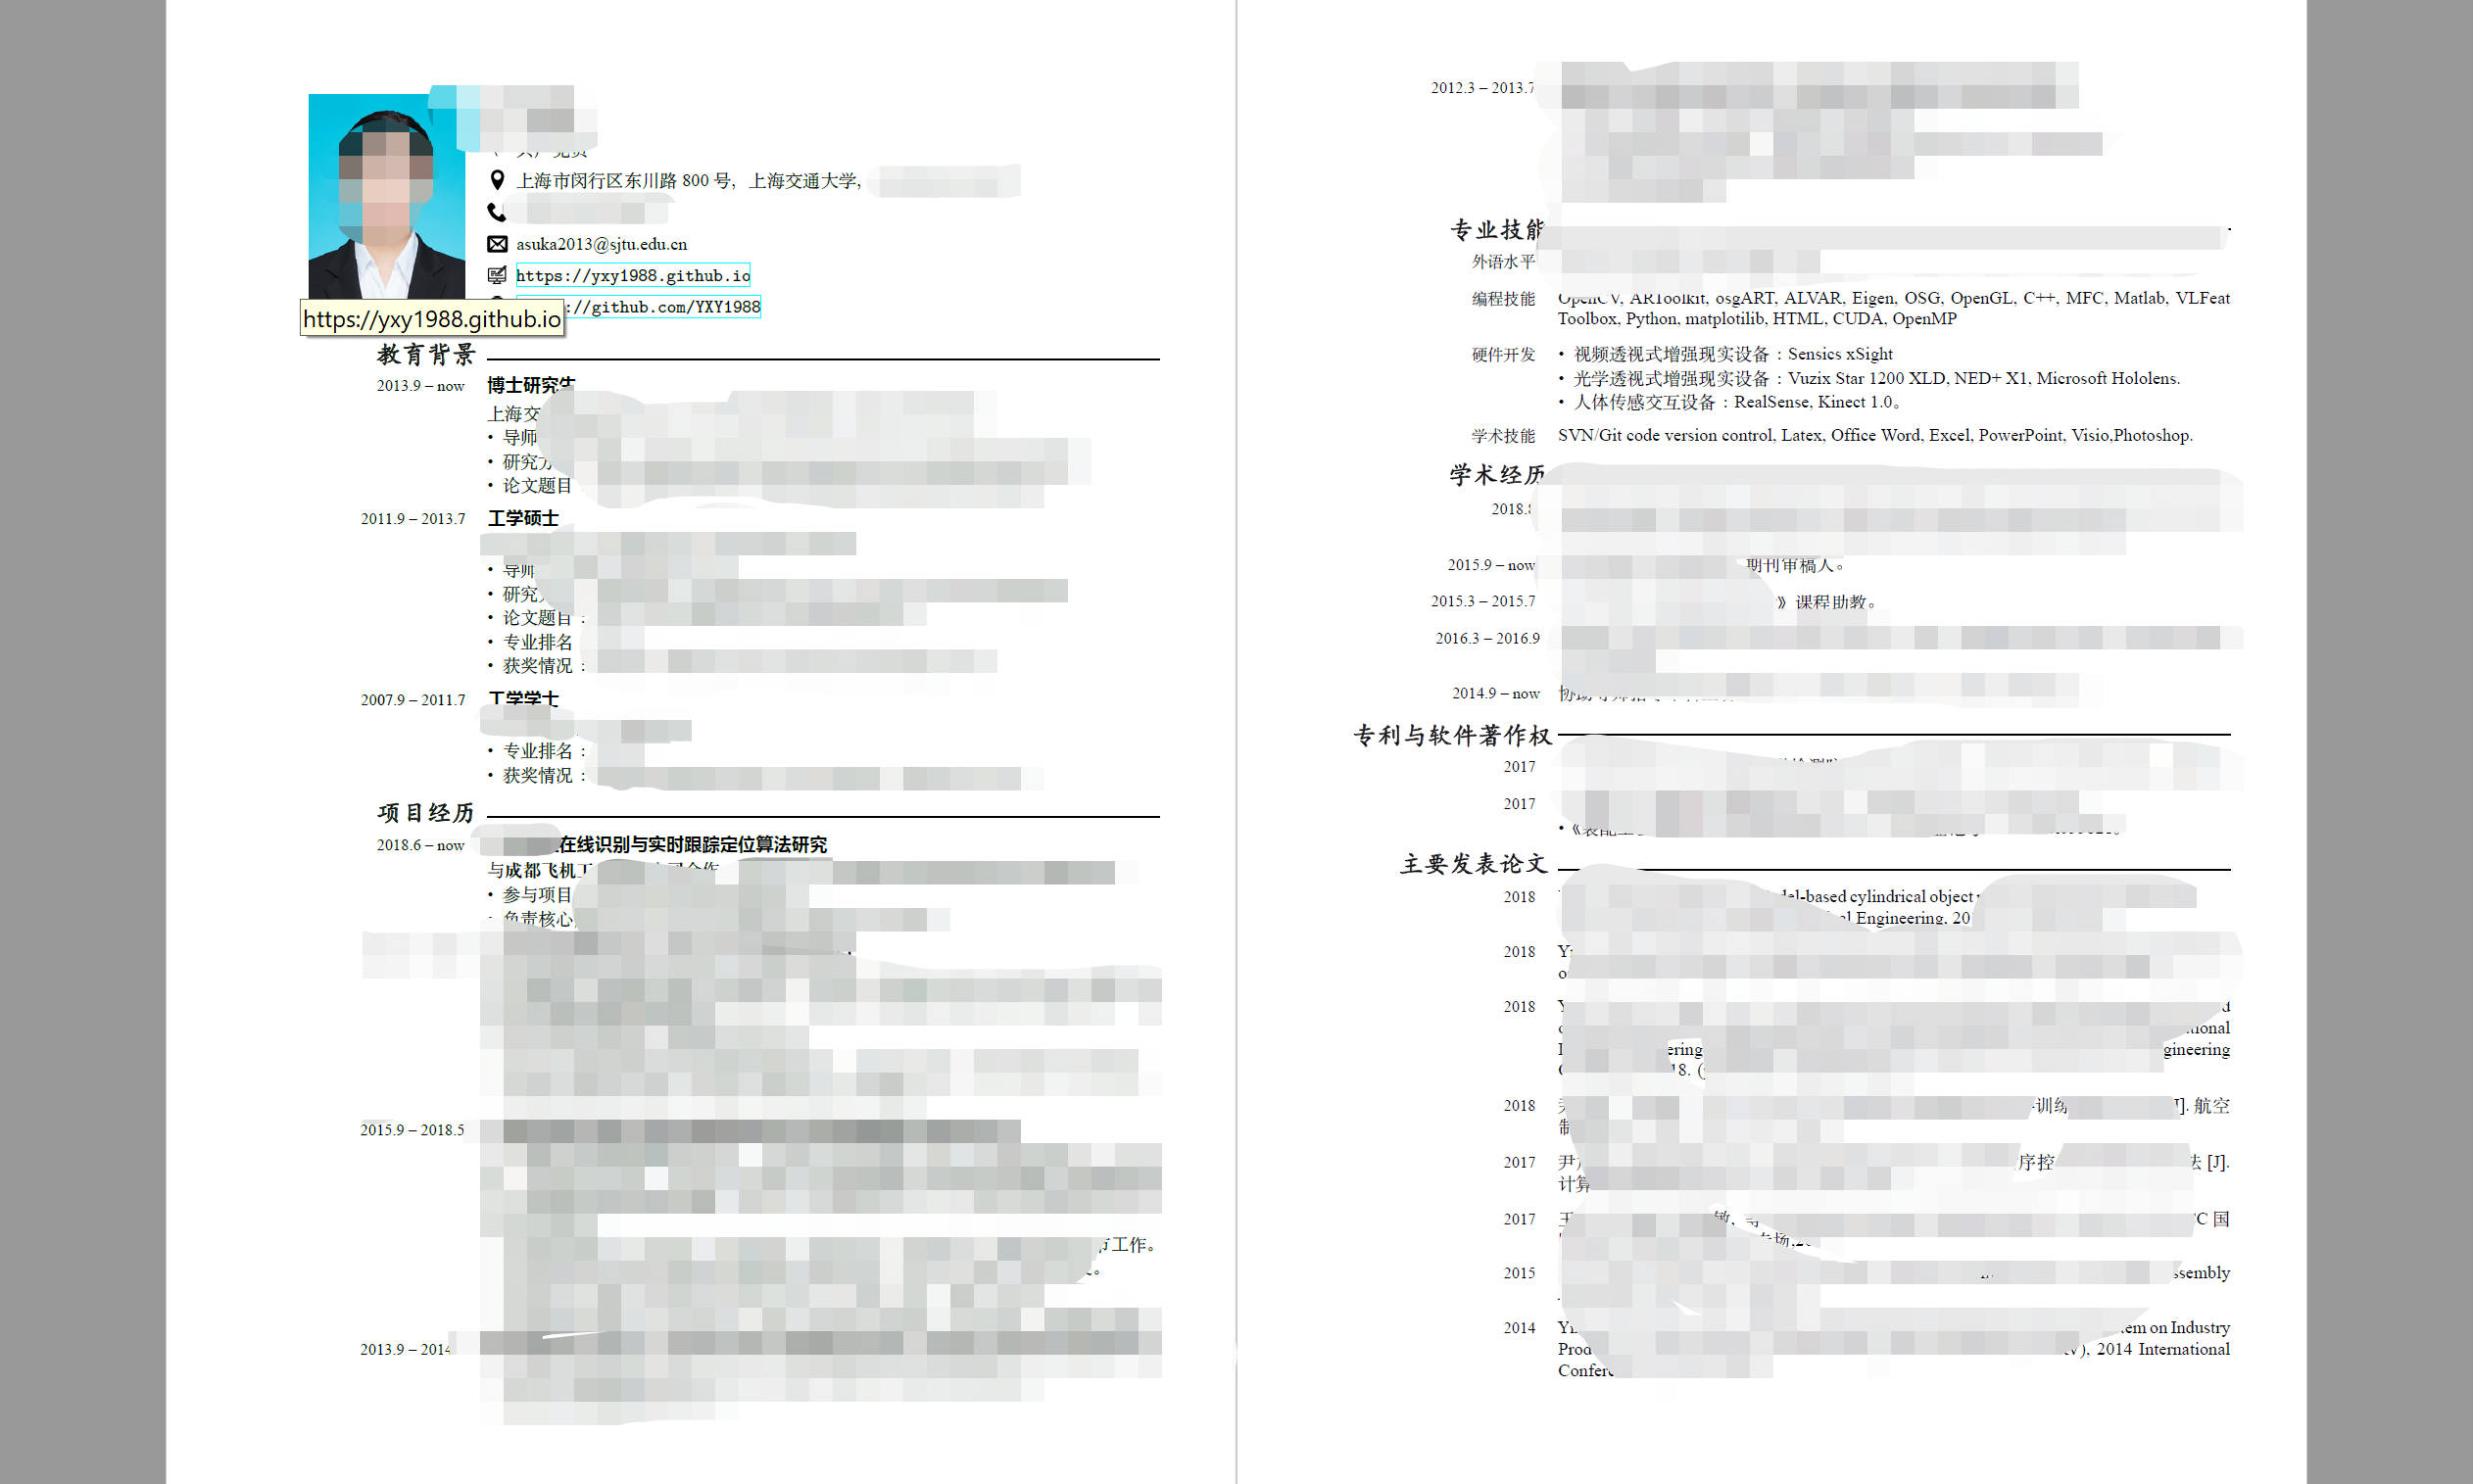
I’ve been job hunting recently. Since I’m looking for a job in China, I need to make a Chinese resume. So those nice English templates like the awesome template can’t be used directly. But wouldn’t it be great if I could learn to transform an English template into a Chinese one? Therefore, this article records the transformation process and the final effect.
Effect Preview
1 Obtain a Basic Template for Transformation
1.1 Where to Find Templates
- Latex Templates
- overleaf (It merged with OverLeaf recently. Since I’m used to TeX Live, I won’t use Overleaf for now, but I’ll consider using Atom later.)
- Taking a template with a photo as an example, I used this template. The initial effect is as follows:

1.2 Preparation for Compiling the Template
- TeX Live 2017
- Compile until you see the effect. There shouldn’t be any problems here.
2 Necessary TeX Packages to Include Before Transformation
Insert the following in the LaTeX macro definition section:
\usepackage{xeCJK}
\usepackage{fontspec}
After that, you can compile Chinese fonts. However, at this point, all Chinese titles will use LaTeX’s default font, so further modification is needed.
3 Font Transformation
Here, I only modified the fonts without changing the colors, advocating minimalism and decluttering.
Before transformation:
% font families
\defaultfontfeatures{Ligatures=TeX}
\newfontfamily{\cvnamefont}{Roboto Medium}
\newfontfamily{\cvsectionfont}{Roboto Medium}
\newfontfamily{\cvtitlefont}{Roboto Regular}
\newfontfamily{\cvdurationfont}{Roboto Light Italic}
\newfontfamily{\cvheadingfont}{Roboto Regular}
\setmainfont{Roboto Light}
After transformation:
\defaultfontfeatures{Ligatures=TeX}
% Note that even though the fonts are redefined below, you still need to use custom commands when writing to apply the fonts
\newfontfamily\kai{STKaiti.ttf}          % KaiTi (regular script)
\newfontfamily\hei{SimHei}           % SimHei (boldface)
% Redefine fonts
\newfontfamily\cvnamefont[BoldFont]{STKaiti} % For name
\newfontfamily\cvsectionfont[BoldFont]{STKaiti}
\newfontfamily\cvtitlefont[ItalicFont]{SimHei}
\newfontfamily\cvdurationfont{Times New Roman} % Use the classic font for numbers
\newfontfamily\cvheadingfont[BoldFont]{SimSun}
\setmainfont{Times New Roman}
Usage in writing:
\cvpersonalinfo{
    % photo
    \includegraphics[height=43mm]{fig/myphoto.jpg}
}{
    % name
   \cvname{\textbf {\kai {Jiucai}}} % Note the \kai command here; when you need to use a non-system default font, you have to use a custom command
    }
}
After replacing the fonts, you can happily enrich the content. Wish everyone who reads this post can get an offer.